Baked Carrot Cake Oatmeal with Greek Yogurt "Frosting"

Carrot cake is my absolute FAVORITE dessert. I ask for it on my birthday, and I love having it as a treat on Easter. Sometimes, when I'm craving it, I make carrot cake cupcakes with a cream cheese frosting. YUM. The flavors and the texture are to die for. This baked oatmeal brings those same flavors and textures to life. Since we, sadly, cannot eat carrot cake every day.


Ingredients (Oatmeal)
  • 3 cups old fashioned, rolled oats 
  • 2 tsps ground cinnamon
  • 1/2 tsp sea salt 
  • 3/4 tsp ground ginger
  • 2 tsps baking powder 
  • 2 cups shredded carrots
  • 3 cups unsweetened vanilla almond milk 
  • 3/4 cup pure maple syrup
  • 1 Tbsp pure vanilla extract
  • 1/2 cup raisins 
  • 1 cup chopped walnuts
Ingredients (Greek Yogurt Frosting)
  • 1 cup 0% plain greek yogurt
  • 1 tbsp honey 
  • 1 tbsp unsweetened vanilla almond milk 

Instructions (Oatmeal)
  • Preheat oven to 375°F, and lightly spray 9.5 x 13" rectangular pan with cooking spray
  • In a medium bowl, combine dry ingredients (rolled oats, cinnamon, sea salt, ground ginger, and baking powder) 
  • In a separate medium mixing bowl, whisk together wet ingredients (shredded carrots, almond milk, maple syrup, vanilla extract) 
  • Add the wet mixture to the dry mixture and stir until combined
  • Pour combined mixture into the prepared baking dish, smooth out with a spatula or the back of a spoon. Press down gently to make sure the oats sink into the mixture. 

  • Sprinkle walnuts and raisins on top, press down gently with spatula again 

  • Bake for 35 minutes, until edges are golden brown 
  • Let stand for 10 minutes 
  • Prepare the greek yogurt frosting: Combine all three ingredients with a whisk
  • Slice into squares, drizzle greek yogurt frosting over the top, and serve

Leftovers may be kept in a fridge for 3 days. We enjoy this for breakfast or even lunch during the week. Enjoy, and happy holidays!

Almond Flour Sugar Cookies

With the holidays quickly approaching, I've got the baking bug. There are are a few things I make each year to share with friends and family. I always say that if baking for others is a love language, it's totally mine. I love to bake and gift the goodies I make. My husband loves pretzel treats... you know the ones I'm talking about. The ones with zero baking involved. Pretzels, rolos, and an almond m&m on top. Easy and done in about 10 minutes. I also make my great-grandma's Italian Spritz Butter Cookies. These are something that I'm definitely going to indulge in. They've been a favorite since I was a very very little girl. I also love to make and decorate sugar cookies. Sugar cookies with frosting are delicious, but sometimes can be a little TOO sweet for my taste. So, I've found a healthier alternative: Almond Flour Sugar Cookies with a Dark Chocolate Drizzle.


Ingredients
  • 2 cups almond flour (sift after measuring) 
  • 1/8 tsp sea salt 
  • 1/8 tsp baking soda 
  • 4 Tbsp pure maple syrup 
  • 2 Tbsp extra virgin organic coconut oil, melted 
  • 2 tsps pure vanilla extract 
  • 1 Tbsp unsweetened vanilla almond milk 
Instructions


  • Combine (sifted) almond flour, salt, and baking soda in a medium mixing bowl, mix well. Set aside 

  • Combine maple syrup, oil, and vanilla extract in a small bowl, mix well. 
  • Add wet ingredients to dry ingredients to dry ingredients, mix well. 
  • Add milk slowly, mixing to break up any clumps of dough there may be. 
  • Form dough into a ball (add almond flour to hand before forming so dough doesn't stick) 
  • Roll dough into a log, refrigerate 4-5 hours or overnight. 

  • Cut log into slices, place on a baking sheet prepared with parchment paper or sprayed lightly with cooking spray. 

  • Bake for 8-10 minutes, until set 
  • Cool for 10 minutes on the baking sheet. Remove from cookie sheet and cool completely on a wire rack. 
  • Melt dark chocolate and use a spoon to drizzle over the cookies. Refrigerate to set the chocolate. 


Keep in a sealed container (add a slice of bread underneath a piece of paper towel as a trick to keep them moist and soft). Happy Holidays 2018!!

Southwest Spaghetti Squash Bowl

I will be the first to admit that I'm not a huge spaghetti squash fan. I think it's a texture and flavor combination thing for me. I know it's super healthy, so I kept adding it to our rotation and trying different flavor combinations. Nothing stuck except for this recipe. So now, I can happily put those feelings aside for this spaghetti squash bowl with a southwestern twist. It's flavorful, healthy and super filling! Even with everything added, this meal is 95% veggies. 


 Ingredients Spaghetti Squash:
  • Parchment paper
  • 1 medium spaghetti squash 
  • Olive Oil (to drizzle) 1 tsp for sauteing vegetables 
  • 1 tsp cumin 
  • 1/2 tsp sea salt 
  • 1 medium onion, chopped
  • 1 medium bell pepper, chopped
  • 2 cloves of garlic, finely chppped 
  • 2 cans black beans, drained and rinsed 
  • 2 Tbsp diced green chilies 
  • 1 tsp chili powder 
  • 1/2 cup chicken broth (low sodium is best)
  • 20 chopped grape tomatoes, chopped
  • 8 tbsp 0% plain greek yogurt (evenly distributed, 2 tbsp per bowl) 
  • 8 tbsp fresh salsa (evenly distributed, 2 tbsp per bowl)
  • 1/4 cup chopped cilantro 

Ingredients Guacamole:
  • 2 Avocados, Chopped 
  • 2 Tbsp Fresh Lime Juice
  • 1 tsp Sea Salt
Instructions Guacamole:
  • In a small bowl mash together avocado, lime juice, and salt using a fork
Instructions Spaghetti Squash Bowl:
  • Preheat oven to 400°F. 
  • Cover a baking sheet with parchment paper
  • Cut squash lengthwise in half, discard seeds. Place squash, cut side up, on parchment-lined baking sheet.
  • Drizzle each half with olive oil. Sprinkle evenly with 1/2 tsp cumin and salt. 
  • Flip the spaghetti squash over so it's cut-side down on the parchment paper. 
  • Bake 60 minutes, or until squash is tender (check by poking with a fork). 
  • Allow it to cool for 10 to 15 minutes and scrape the spaghetti squash with a fork into stringy noodles. Set aside.  
  • Add onion and bell pepper. Cook, stirring frequently until onion is translucent. 
  • Add garlic and cook for another minute. 
  • Add beans, chilies, 1/2 tsp cumin, chili powder, and chicken broth. Bring to a boil. Reduce heat to low, stirring occasionally for 10 minutes. Set aside. 
  • Chop tomatoes and Prepare Guacamole 
  • Divide squash evenly between four serving bowls. Top evenly with bean mixture, guacamole, salsa and greek yogurt
I always add extra cumin and some garlic powder to the top of my bowl as well. I like the flavor combo! This makes four large servings. We like to make them and either eat the leftovers or pack them in our lunches (the lives of teachers and brown bagging it every day). 

Transform 20: Transform Your Life

Shaun T's Newest Program is coming in 2019


"Conquer your mind so you can transform your life."

You guys, Shaun T is my absolute FAVORITE super trainer. So when I found out about this program, I seriously geeked out. He is so motivational and such an inspiration he will make you want to keep working out (even when you're out of breath and don't think you can do anymore). If you are just like me, and can't get enough of this man and his programs, then I have some awesome news for you! VIP Access to Shaun T's newest program, Transform: 20, is available for purchase starting December 4th, 2018 with Early Access kicking off on January 14, 2019. Transform 20 will officially launch to Beachbody On Demand April 1, 2019.

What is Transform: 20 All About?!

Shaun T is coming your way with TWENTY MINUTE workouts! Everyone has 20 minutes to devote to their health and fitness... 20 minutes is less time than it takes to cook a meal or watch your favorite tv show. You'll be working every single part of your body (and your mind) with this six-week long program.

Rather than repeating exercise videos, Shaun T will be dropping new workouts every single day, six days a week for the duration of the program. That means you'll scorch fat, flatten your stomach, and get lean and toned without getting bored! Plus, Shaun T will be releasing new mindset videos on rest days to help you transform your mind as well. The mindfulness portion is AWESOME. Health and Fitness is truly a journey in both mind and body, and he is the best at helping you achieve your best results for both!

Transform 20 is clearly awesome for anyone out there who loves Shaun T as much as me. However, it's also great for anyone who wants quick workouts with minimal equipment and the built-in motivation that comes with having Shaun T as your super trainer. As always, there is a modifier for the program, so you can make the workout fit for your fitness level and ability. 

Who is Transform 20 For?

Everyone!! Shaun T created this new program knowing that there are a lot of people out there who don't have time to work out. As a new father himself, he finds less and less time to get workouts in. As a parent, I definitely know how this goes! This is exactly what motivated him to create a program for EVERYONE. If you think that 20 minutes isn't enough, just wait until your first Transform: 20 workout! I speak from experience, it's MORE THAN enough! 

When Can I Start Transforming?

You can join my virtual accountability group for January 2019 with VIP early access. However, you can start transforming now. Click here to send me an email and join our accountability groups  now as we wait for the launch of Transform: 20. I run new accountability groups each month, and I'd love to have you join us!

What Equipment Do I Need? 

The Beachbody Step

Get ready to transform your body in just 20 minutes a day with Shaun T and a Step. This step program is nothing like old-school step aerobics. Less dance, more functional. You'll burn fat while sculpting and toning all parts of your body. Shaun T also created weekly behind-the-scenes videos where he and the cast discuss their challenges and triumphs. It helps to keep everyone motivated to stay committed and finish strong. 

Let's recap!

  • 20 Minute Workouts
  • 6 Days per Week 
  • 6 Week Program 
  • Modifier in Every Workout 
  • Each workout is in REAL TIME... you will never see the same workout twice! 
  • A super simple nutrition plan to help you achieve and sustain your goals! 
I am hosting a Transform: 20 VIP Information Group for anyone who wants more insider information about the program.

If you're ready to jump in with Transform: 20 fill out this form and I'll get back to you as soon as I can!

In the meantime, check out this video!

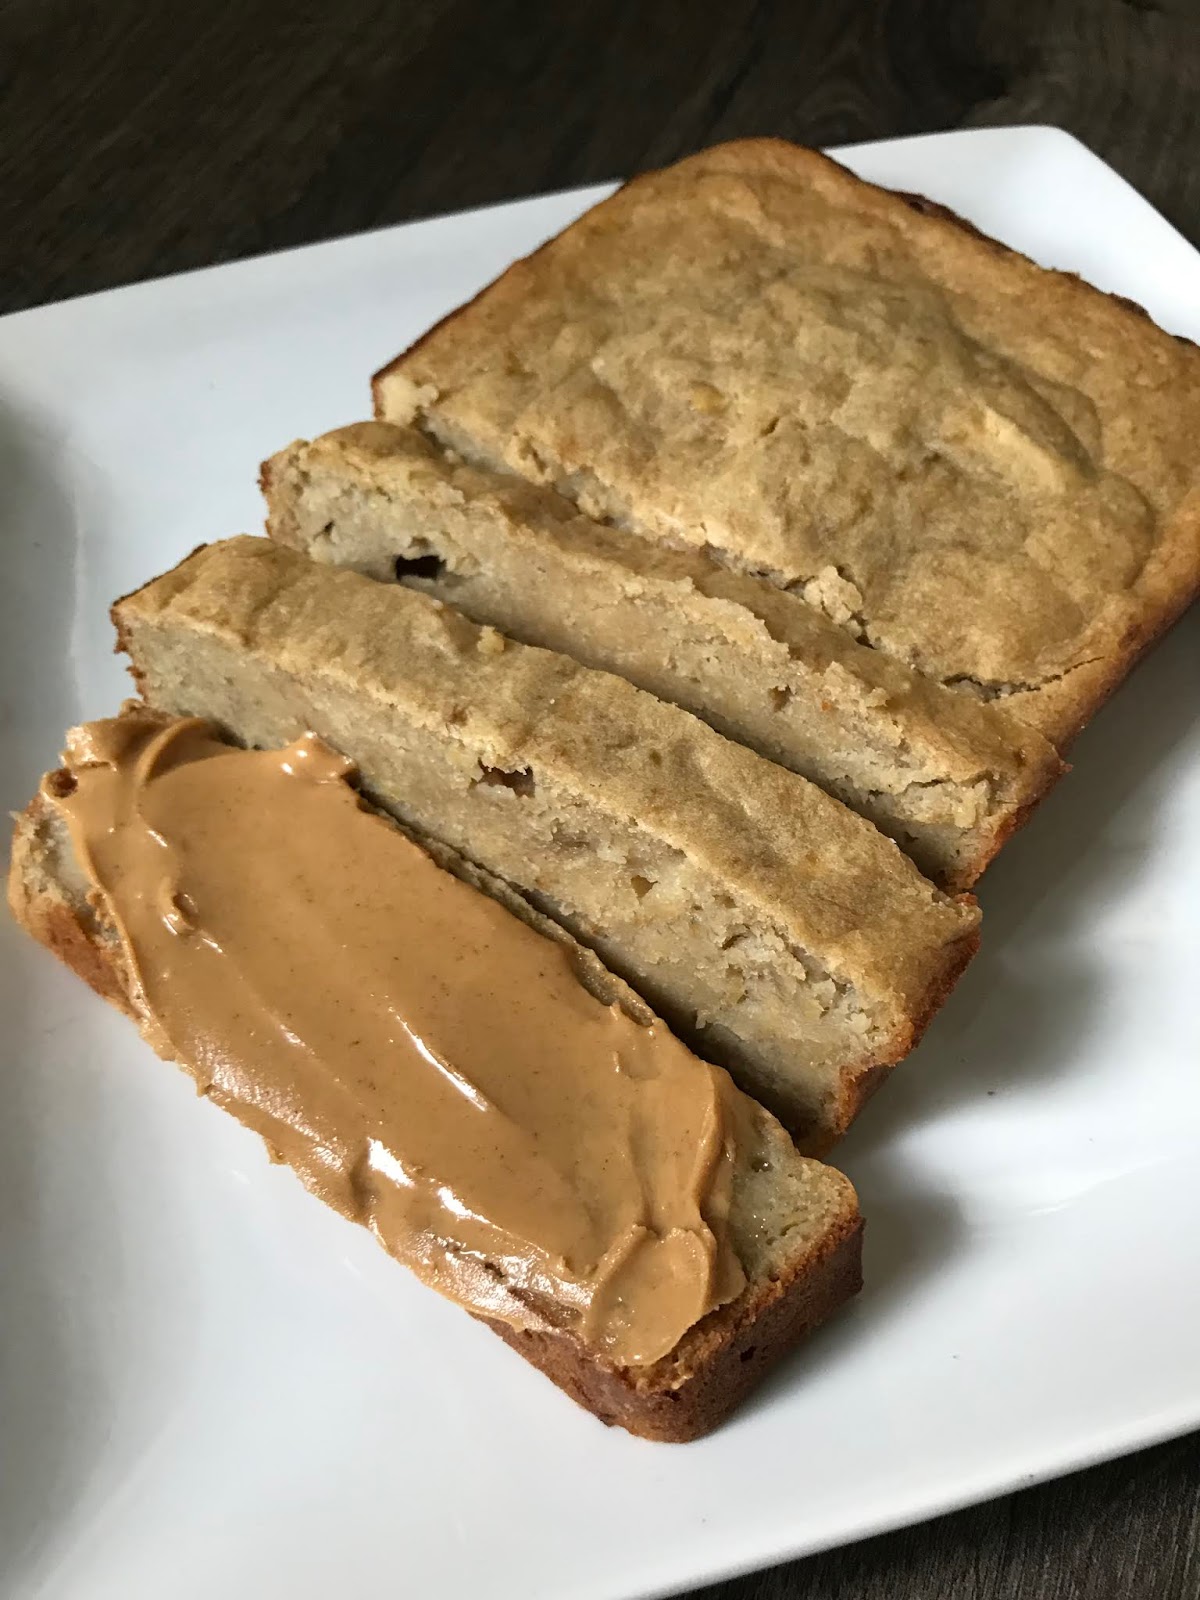
Banana Bread


Banana bread is a sneaky treat. It sounds healthy, but it often has a lot of sugar and fat. This version is just as yummy and is a bit friendlier for your waistline. This recipe includes healthy coconut oil and coconut sugar. You can have a very generous serving of this and slice it into 8 slices, but we prefer to make it last and cut it into slivers.


Ingredients
  • 3 large, ripe bananas, mashed 
  • 1/4 cup melted extra virgin coconut oil 
  • 1 large egg 
  • 1 tsp pure vanilla extract
  • 1/2 cup almond flower 
  • 1 cup flour 
  • 1 tsp baking powder 
  • 3 tbsp coconut sugar 
  • 1/2 tsp sea salt


Instructions

  • Preheat oven to 350°F
  • Coat a bread pan with cooking spray, set aside 
  • Combine mashed bananas, oil, egg, and vanilla extract in a mixing bowl, mix well to combine 
  • Combine almond flour, flour baking powder, sugar, and salt in a separate mixing bowl, stir to combine 

  • Add flour mixture to banana mixture, slowly until a smooth batter forms 
  • Pour and spread batter into bread pan

  • Bake for 35-45 minutes, or until a toothpick comes out clean 
  • Cool for 5 minutes in pan 
  • Remove loaf from pan and allow to cool completely on a cooling rack 

My favorite way to enjoy this banana bread is for breakfast with a tbsp of natural peanut butter and my cup of coffee. Give it a try!

Transformation Journey: 80 Day Obsession

This transformation and this program is where I realized that abs truly are made in the kitchen!


This program was 80 days. I will be honest and say that I did not plug into the nutrition plan 100% until a few weeks in. I kicked myself for that. I was eating what I thought was healthy, but realized when I properly fueled my body, I had more energy and my body responded and rewarded me for my efforts.  The first two pictures are only two weeks apart. TWO WEEKS! Nutrition plays a HUGE role in your results. You can’t outrun or outwork your fork.

I know how difficult and how daunting clean eating can be at first.
It gets easier as you do it. Take it in steps and make small changes. Remember, you’ve got this. If you ever need support, let me know. I’ll be your biggest cheerleader. 80 Day Obsession is a step-by-step fitness and nutrition program designed to get you flatter abs and a toned bum. What's unique about this format is that it includes 80 different workouts so you never get bored. It also completely overhauled my view of nutrition. This program included a nutrition plan based on the Timed-Nutrition theory, so you're fueling your body strategically pre and post-workout to burn fat, build muscle, and keep your energy up... which leads to incredible results! The workouts are a little more intense, but if you're a beginner there's a modifier for you! Each workout is anywhere from 30-60 minutes long, with most averaging 45-60 minutes in length.

If you are interested in hearing more about this program or more about the accountability groups I run each month, fill out this form and I'll get back to you soon.


Black Bean Tostadas

I love Mexican food. I could honestly eat it every single night. Burritos, tacos, taquitos, enchiladas, quesadillas... you name it, I love it. I make it a point to meal plan at least one healthy version of my favorite dishes once a week. This one is super simple to make. We are all about quick, easy, and healthy meals on busy week nights. This one checks all of those boxes.


Ingredients Tostadas:

  • 6 Corn Tortillas 
  • 1 tsp Extra Virgin Olive Oil
  • 2 Garlic Cloves, Minced (1 tsp) 
  • 1 Can Black Beans, Drained and Rinsed
  • Hot Sauce (optional) 
  • 3 Cups Baby Spinach, Chopped 
  • 1/2 cup fresh cilantro, chopped 
  • 6 Tbsp 0% Plain Greek Yogurt
  • 10 Cherry Tomatoes, Chopped and Divided 

Ingredients Guacamole: 

  • 1 Avocado, Chopped 
  • 1 Tbsp Fresh Lime Juice
  • 1/2 tsp Sea Salt

Instructions Guacamole:
  • In a small bowl mash together avocado, lime juice, and salt using a fork

Instructions Tostadas: 

  • Preheat oven to 425°F 
  • Spray both sides of the corn tortillas with Olive Oil Spray
  • Place in the oven for 12 minutes, flipping half way through 
  • Chop baby spinach leaves into small pieces
  • Chop 1/2 cup cilantro
  • Chop tomatoes, divide them 
  • In a large skillet, heat olive oil over medium-low heat
  • Add garlic, beans, and hot sauce to taste, cook for 4 minutes, slightly mashing with a fork 
  • Remove beans from heat 
  • Top the crispy tortillas with the bean mixture, spinach, cilantro, tomatoes and guacamole, and 1Tbsp Greek Yogurt 

These are best when eaten with a fork and knife. I hope you enjoy them!

Homemade Coconut Dark Chocolate Bars

These homemade dark chocolate and coconut bars are healthy and hit the spot... Especially when you're craving something sweet. There are only 6 ingredients (I promise you can name all of them!) and they're super easy-to-make, which makes them even better in my book. They're also husband and toddler approved! 


Ingredients

  • 2 cups of medjool dates, pitted and chopped
  • 1/2 cup raw almonds 
  • 1/2 cup raw, unsalted peanuts
  • 1/2 cup unsweetened, shredded coconut 
  • 1 1/2 Tbsp unsweetened cocoa powder 
  • 1/2 cup dark chocolate chips (60%+ Cacao) 


Instructions
  • Chop and pit dates
  • Combine dates and all other ingredients in a large blender or food processor 
  • Pulse then blend until all ingredients become smooth and form a large lump
  • Line an 8x8 pan with parchment 
  • Remove ingredients from blender/food processor and press into the pan 

  • Refrigerate for 30 minutes until firm 
  • Cut into squares 
  • Keep in an airtight container in the refrigerator for up to a week 
When you make these you're guaranteed to have a healthy snack to reach for in the fridge. We love having them on hand! Hope you enjoy! If you try them please leave a comment and let me know what you think! 

Transformation Journey: Insanity Max: 30

This transformation is near and dear to my heart. It's a HUGE deal for me. This was after having Gabe. Prior to pregnancy I was the healthiest and fittest I had ever been. A short 4 months after I had gotten my results from T25 I got pregnant with Gabe. While I made a conscious effort to stay active with prenatal workouts and walks around the neighborhood, I gained quite a bit of weight. My weight had reached 170 when I had Gabe.

I will be honest. I wasn't worried about trying a million things to fit back into my pre-pregnancy jeans. I had something that I knew would work because it had worked for me a year before: an at-home fitness program under the guidance of a superstar trainer with a simple-to-follow nutrition plan paired with an online accountability group full of supportive people reaching for the same goals.

The program is by one of my favorite super-trainers, Shaun T. This time it was Insanity Max: 30. 30 minutes a day, 5 days a week with NO equipment needed. You use your body weight to get insane results.

These were my results:


Insanity Max: 30 can help you get ridiculous results in just 60 days thanks to Shaun T's MAX OUT training. You work as hard as you can during each workout for as long as you can until you "Max Out" (when you just can't do anymore or begin to lose form). You get to log your Max Out time, and when you come to the workout again try to crush your previous week's time.

These are total body workouts that feature some killer cardio with tabata-style strength workouts. They help you lose weight and sculpt and tone your body.

Believe me when I say this program wasn't the easiest thing I've jumped into. There was a lot of sweat and (some) tears involved.  BUT! I made it through and lost 45 pounds in 60 days. If I can do this, you can too. There is a modifier for every single work out, so everyone can push to their max.

If I can do this, you definitely can too.

If you think this program might be the right fit for you, you can grab the challenge pack here. The challenge pack comes with an insane value. With it you get one year of access to ALL of the programs Beachbody has created, plus anything released within the year of your subscription. So when you're done with Max: 30, you can jump into another program. You also get a month of our superfood shake (I have it every day for breakfast--vanilla is my favorite!), as well as all of the materials you need to get your nutrition started off on the right foot. If you decide to join, you will also get access to all of my support and accountability groups for free for the year. I'd love to be your biggest cheerleader! It's a wonderful community.

If you're interested in joining an accountability group and starting or continuing your own health and fitness journey, but don't think Max: 30 is the right program to start, fill out this form. I'll be in touch to chat with you so we can find the best program to fit your needs and start you on your own transformation journey.

Pumpkin Sandwich Cookies

Who doesn't love a good cookie? In an attempt to make a healthier version of a whoopie pie, I ended up creating what Nate called a sandwich cookie. He was the first to tell me that "these are not whoopie pies, but they're delicious." So, sandwich cookie it is! I like to think of this as a happy accident. I love the texture, especially with the oats and chopped pecans. YUM! They're also a cookie you can feel a little less guilty about having as a treat. Without further ado, here's the recipe!


Ingredients for Cookies:
  • 1 cup dry old-fashioned rolled oats
  • 1/2 cup all-purpose flour
  • 1/2 tsp ground cinnamon
  • 1/4 tsp baking powder 
  • 1/4 tsp sea salt
  • 1/4 cup extra virgin coconut oil 
  • 1/4 cup coconut sugar
  • 1 large egg 
  • 1/2 tsp pure vanilla extract 
  • 1/2 cup chopped pecans

Ingredients for Pumpkin Filling

  • 1/4 cup heavy whipping cream 
  • 1/2 tsp unflavored gelatin
  • 1/2 cup pure pumpkin puree
  • 2 Tbsp coconut sugar 
  • 1 pinch sea salt 
  • 1/4 tsp ground cinnamon 
  • 1/4 tsp ground ginger
  • 1/4 tsp ground nutmeg 
  • 1/2 tsp pure vanilla extract

Instructions for Cookies
  • Preheat the oven to 350º F
  • Line a baking sheet with parchment paper, lightly coat with cooking spray 
  • Combine oats, flour, cinnamon, baking powder and salt in a large bowl; mix well, set aside
  • Combine oil and sugar in a mixing bowl; beat until light and fluffy (about 3-5 minutes) 
  • Add egg and extract; beat until well blended 
  • Gently fold in oat mixture using a spoon (or clean hands); mix until just blended
  • Fold in walnuts
  • Spread 16 round Tbsp of dough onto prepared baking sheet, lightly press down for a flatter cookie shape 
  • Bake 15 to 18 minutes, rotating the baking sheet once halfway through, cookies should be a golden brown when done. 
  • Cool cookies completely before filling (you don't want the hot cookie to melt the delicious filling!!) 
Instructions for Pumpkin Filling

  • While your cookies are baking, combine cream and gelatin in a large mixing bowl, whisk to blend. Let stand for 5 minutes
  • Add pumpkin, coconut sugar, salt, cinnamon, ginger, nutmeg, cloves, and extract to cream mixture; whisk to blend. 
  • Add pumpkin mixture to a large skillet. Bring to a boil over medium heat, stirring constantly
  • Reduce heat to medium-low; continue to cook for 3 to 5 minutes until mixture has thickened slightly (stirring constantly) 
  • Place pumpkin mixture in a heat-proof bowl (I used my Pyrex!), then place bowl in an ice bath. Chill for 10 to 15 minutes, or until pumpkin mixture has set to a pudding-like consistency 
  • Transfer pumpkin filling to a piping bag (or a large plastic bag). Refrigerate until it's time to fill the cookies.

Instructions for the Sandwich Cookies

  • Pipe approximately 1 Tbsp of filling on flat bottom of a cookie 
  • Press another cookie on top to form a sandwich 
  • Continue with the remaining cookies 
  • Store in an air-tight container for up to 4 days

I hope you all enjoy these sandwich cookies as much as we do! They may not be whoopie pies, but they are definitely a delicious treat! They come in at only 220 calories and only have 9g of sugar so they're able to be enjoyed with a lot less guilt.

As always, let me know if you try them!


Transformation Journey: T25

I want to take you on my transformation journey. This is the first post in a series that will be coming out each week on Tuesday. You'll get to learn a little more about me and why I fell in love with health and fitness. 

I started my health and fitness routine a LONG time ago. These pictures were taken before I got pregnancy with Gabe. They are from January, February, and March 2014. 


You see, I was never comfortable in the gym. I didn't know what to do. Weights? Heck no. Treadmill and ellipticals were the only thing I could muster up the courage to do. I used to call myself a treadmill rat. While I was still burning calories, my body wasn't changing and toning how I wanted it to. Not to mention, unless I had a groupon for a deeply discounted month at the gym, I couldn't afford it. It was EXPENSIVE to be a gym member in Chicago. 
This is when I reached out to a friend and joined an online community. I completed my very first at-home workout program from start to finish. I cleaned up my eating and found a love of cooking and healthy foods. Nate was there with me every step of the way. Sometimes he takes an extra gentle push to get going, but as soon as he jumps in he's ready to go and crush it right along with me.


We were busy teachers with a puppy and a busy social life at the time. We didn't want to spend an hour working out. It just didn't fit well with our schedule. In reality, it was an excuse. But when this program was brought to our attention, we knew we had no more excuses. The program we chose to start our journey with was Focus T25 by Shaun T and Beachbody. The workouts are only 25 minutes a day. They were perfect for our schedule.
Focus T25 is a ten week program split into two cycles. Each cycle lasts five weeks. In 25 minutes you get everything you need for a transformation and nothing you don't. If you focus your intensity for 25 minutes, and you complete the program as it is laid out (5 days per week), you WILL get results. Our photos are proof of that.

30-40 minute workouts are our sweet spot. When we found out we could workout in under 30 minutes and get insane results it was hard to say no. Major studies have shown that 30 minutes of exercise can be just as effective at burning fat and even MORE efficient than 60 minutes of exercise. The fast-paced workouts of T25 are jam-packed with dynamic, high-intensity moves that are designed for maximum effectiveness. Every minute of this workout counts! This workout is perfect for busy people who want to work out for less time but still get in the best shape of their lives.
Shaun T will be your trainer for this program. I'm sure you've all heard of Insanity. Shaun T is my FAVORITE. He's tough, but it's tough love. He is so motivating and inspirational, that you'll be happy to crush the workout like he expects you to. 

This program changed our lives. It changed how we view at-home fitness programs. It made me a believer and we have never looked back. This is how I do what I do. It's how I've learned to LOVE health and fitness and it's why I love to pay it forward to others. 


If you think this program might be the right fit for you, you can grab the challenge pack here. The challenge pack comes with an insane value. With it you get one year of access to ALL of the programs ever created. So when you're done with T25 you can jump into another program. You also get a month of our superfood shake (I have it every day for breakfast and it has completely changed my digestion), as well as all of the materials you need to get your nutrition started off on the right foot (Hello, nutrition plan!). If you decide to join, you will also get access to all of my support and challenge groups for free for the year. I'd love to have you join! It's a wonderful community. 


If you're interested in joining a challenge group and starting or continuing your own health and fitness journey, but don't think T25 is the right program to start, fill out this form. I'll be in touch to chat with you so we can find the best program to fit your needs. 

Chicken and "Rice" Soup

With fall comes crisp weather and soup season! I LOVE making a huge batch of homemade soup. Soup is hearty and comforting and it warms your soul. In this recipe we swap brown rice or quinoa with organic cauli-rice. Extra veggies!!! And I promise, you won't even miss the rice. (But if you do, feel free to swap the cauli-rice out for 1c brown rice or quinoa.)


Chicken and "Rice" Soup 

Ingredients


  • 1 Tbsp Extra Virgin Olive Oil
  • 3 cloves garlic, minced
  • 2 chicken breasts, cooked and shredded
  • 3-4 large carrots, thinly sliced
  • 3-4 stalks of celery, thinly sliced 
  • 1 large onion, diced 
  • 2 32oz cartons low-sodium, chicken broth 
  • 1 bag frozen cauli-rice
  • salt, pepper, and Italian seasoning to taste

Instructions

  • Thinly slice carrots and celery
  • Dice onion
  • Heat a large pot and 1 Tbsp EVOO over medium-high heat 
  • Add garlic and diced vegetables, cook until soft, stirring occasionally (about 5-10 minutes) 
  • Season with salt (minimal), pepper, and Italian Seasoning
  • Add chicken broth, cooked chicken breast, and cauli-rice, bring to a boil
  • Reduce heat and simmer for 15 minutes
  • Taste and add seasoning if desired 
  • Dish and Serve
  • Keep leftovers refrigerated for up to 5 days
This is our go-to recipe. It's as delicious to eat as simple as it is to make. Enjoy and stay warm!

Carrot Fries

When we go out to eat at a restaurant french fries are something I love to treat myself with. Admittedly, they're my weakness. I LOVE any type of fry but I especially love Sweet Potato Fries. I also love that they're somewhat of a healthy alternative to regular, deep-fried french fries. They were my go-to at restaurants and I was always on the hunt to find the best ones in town. They were also our go-to when we grilled burgers. Until I met the carrot fry. I tried a few recipes and finally tailored one to my liking. I don't even miss regular fries OR sweet potato fries now. These are so delicious that they hit the spot. They're crispy, have a punch of flavor, and come with a side of greek yogurt dipping sauce. Win, win, win! 


Carrot Fries (serves 2)

Ingredients: Carrot Fries:
4-6 Large Carrots
1 ½  Tbsp Olive Oil
2 tsp garlic powder
½ tsp pepper
¼ cup grated parmesan cheese

Dipping Sauce:
4 Tbsp Greek Yogurt (0% plain)
1 Tbsp Lemon Juice
½ tsp minced garlic
½ tsp pepper

Instructions Dipping Sauce:
  • Place all ingredients into a bowl and stir to combine
Instructions Carrot Fries:
  • Preheat oven to 450°
  • Line baking sheet with parchment paper
  • Slice the top and bottom off of carrots then slice them in half, slice each half into thirds lengthwise.
  • In large bowl mix together oil, garlic powder, pepper, and parmesan cheese with carrots
  • Once thoroughly seasoned, move the carrots from the bowl to the parchment-lined baking sheet, place in the oven 
  • Bake for 25-30 minutes (flipping/stirring at 15 minutes), depending on how crispy you want them.
  • Serve with dipping sauce

These are honestly one of my favorite side dishes to serve when grilling food. We've shared the recipe with our families who also wholeheartedly approve. I can't wait for you to try them! 


Vegan Peanut Butter Chocolate Cheesecakes

Peanut butter and chocolate. Honestly, is there a better combo? This is one of my biggest cravings, so I love to try to incorporate it when I can. I always tell Nate I have a peanut butter problem. If you love peanut butter and chocolate as much as me, you've got to try these vegan, raw cheesecakes!


Ingredients
  • 1/3 cup raw, unsalted peanuts
  • 2/3 cup raw almonds 
  • 1/2 cup unsweetened coconut flakes
  • 8 medjool dates, pitted and chopped
  • 2 tablespoons unsweetened cocoa powder
  • 1 cup raw cashew pieces, soaked overnight and drained
  • 1 cup unsweetened vanilla almond milk 
  • 1/4 cup melted coconut oil
  • 1/3 cup pure maple syrup 
  • 1/4 cup unsweetened cocoa powder
Instructions

  • Line a muffin tin with cupcake liners 
  • For the crust
    • pulse peanuts, almonds, coconut flakes, dates, and 2 tablespoons cocoa powder in a food processor or blender until crumbly and it holds together when pressed. 
    • **Do not over pulse or the crust will become too soft and chewy. Ideally you would like a bit of crunch for the texture. 
    • Press tablespoons of this mixture into the bottom of the lined muffin tins. Place in the freezer and clean the blender.

  • For the filling: 
    • puree the soaked cashews, coconut oil, almond milk, and maple syrup until smooth. Remove muffin tin from the freezer Spoon half of this mixture onto the crusts. This is the peanut butter portion of your cheesecake
    • Place back into the freezer (these will set quickly)
    • Add 1/4 cup cocoa powder to the peanut butter mixture in the blender, and blend until combined. 
    • Remove cheesecakes from the freezer and spoon and smooth the chocolate filling on top of the peanut butter layer. Decorate with halved peanuts (optional).

  • Place back in the freezer until ready to eat. 
I recommend taking these out about 10 minutes before serving them. I also recommend using your fingers to eat them! They get a bit crumbly when serving with a fork. Although, if you want to eat them straight from the freezer they're like an ice cream treat!

These cheesecakes definitely a good way to treat yourself! They're rich and decadent without refined sugar and processed ingredients.

I think you'll love these!

Banana Muffins

We are busy, busy, busy during the week. Sometimes snacking can be a problem so we try to have healthy snacks on hand. These muffins are the perfect solution. They're gluten-free and made with almond flour. They're packed with banana flavor and so quick and easy to make.


Ingredients
  • 2 Medium Bananas, Mashed 
  • 1 Tbsp Unsalted Butter, Melted 
  • 2 Large Eggs, Lightly Beaten
  • 1½ cups almond flour 
  • ¾ tsp. baking soda
  • 1 dash sea salt (or Himalayan salt)
  • Cooking Spray

Instructions
  • Preheat oven to 350° F
  • Line muffin pan with nine muffin papers and lightly coat with spray. Set aside. 
  • Combine eggs, banana, and butter in a medium bowl; mix well. Set aside. 
  • Combine almond flour, baking soda, and salt in a medium bowl; mix well.


  • Add dry mixture to egg mixture; mix until blended. 
  • Divide batter evenly between prepared muffin cups, ¾ full 
  • Bake for 20 to 22 minutes, or until golden brown and toothpick inserted into the center comes out clean. 
  • Transfer muffins to rack; cool.

Give them a try! You might just have a new favorite snack to grab on the go!

Gabe's Story

Gabe was born on March 16, 2015. He arrived quickly and was given a 9 on the APGAR scale. After a few hours of getting to know the newest member of our family, he was accompanied by Nate to the nursery for his first sponge bath and check-up. While the nurse was looking him over, she noticed a dark space in the roof of Gabe's mouth. With the use of a flashlight, she realized that Gabe had been born with a cleft palate, which had not come up in any prenatal ultrasounds, nor in his initial checkup by the pediatrician after birth. Our joyous morning had taken an unexpected turn.

The Day Sweet Gabriel Was Born 3/16/15 11:11AM


Gabe's first 24 hours were precious, but difficult. Most notably, he had difficulty eating and could not form a seal to breastfeed or to suck on a bottle. We learned how to use specialty bottles very quickly, but Gabe still wasn't eating enough. The next day he was taken via ambulance to Geisinger Medical Center in Danville, Pennsylvania while Nate and I drove home with an empty car seat to pack for our stay in the NICU. Arriving home to pack without a baby in tow and seeing his finished nursery was heartbreaking for me. We packed as quickly as possible and made our way to Danville.


Daddy Learning  How to Feed Gabe with One of Many Specialty Feeders We Would Try Before Finding Dr. Browns Specialty Feeders

When we arrived at the hospital, we were thrilled to discover the wonderful doctors and nurses who had been caring for Gabe in our absence. Over the following days we had numerous meeting with the various experts on Gabe's Cleft Team, as we learned more and more about how to care for our extra-special bundle of joy. This care and professionalism would continue throughout our countless trips to Danville, and during a successful surgery to close his cleft. We had never anticipated being the type of parents who would become so familiar with the layout of a hospital, but here we were.


The Day of Gabe's Cleft Palate Repair Surgery

9 Months Old! With Those Pesky No No's! Still Smiling. Always Smiling.
From day one, Gabe has been a fighter! What better way to recognize his courageous and fighting spirit than to join a community filled with other brave little boys and girls. Tiny Superheroes is a project that seeks to empower kids with unique illnesses or disabilities by sending each child a handmade cape. Gabe wears his cape to each and every appointment and surgery. It has been a source of strength and encouragement for our entire family, and the community as a whole is incredibly supportive.
You can sponsor a cape for a Tiny Superhero just like Gabe!

Gabe's Photoshoot for Beauty Revived's 50 Beautiful Children Campaign. Photo Credit: RFK Photography


As we went through our check-ups, cape in tow, we learned that Gabe had a number of unique traits (ptosis and pseudoarthrosis of the clavicle among others)  that led to doctors recommending genetic testing. As it turns out, Gabe had two different "spelling differences" in his genetic makeup that had almost identical symptoms. We were unsure how this would affect Gabe's future health, not to mention the possibility of any future children. Again, our family's future had changed abruptly and unexpectedly. 

After months of consultations, blood tests, Thomas the Train bandages, and saliva swabs, we were able to identify that one of these syndromes was very unlikely to have any negative side effects on his growth and development. In addition, we learned that any future little brothers or sisters who may have similar syndromes would also see little to no negative effects on their health. Gabe's current diagnosis is Coffin Siris Syndrome. His genetics team is confident that he will continue to grow and develop as he is now, bright and healthy. We will continue to closely monitor his unique qualities throughout the remainder of his life.

Gabe's EKG with the Pediatric Cardiologist. He was a Trooper and His Heart is PERFECT! 
Gabe's EEG for the Pediatric Neurologist. Gabe Counted the Wires and Named the Colors

Gabe's journey has been a little different than anyone expected, but he has handled each challenge with tremendous courage and an infectious sense of humour. In only three and a half short years on earth, he is already the strongest and most inspiring person we know.


Photo Credit: RFK Photography